
How to Lift a GIANT Pumpkin
I don't own heavy equipment, so I needed to find a way to lift my giant pumpkins that I could rely on every year. Dale and I have perfected our system over the past 3 years, and below is a step-by-step guide on how we did that. But first, a funny video!
Materials:
Three 16-foot 4x4's
1/2" x 12" carriage bolt
Two nuts
Two washers
9 feet of 1/4" G70 chain with grab hook on one end - This wraps around the 4x4's on the top of the tripod so you can attach the chain hoist. Ours is a bit too short (80 inches) and would be a lot easier if it were longer. Make sure it is rated to hold at least the weight of your pumpkin. We got our chain at Tractor Supply Company.
Two large tractor clevises - I got mine at Tractor Supply Company. Make sure it is big enough to clip over 3 layers of your chain.
Three pieces of rebar
Pumpkin strap lifter - I got mine at P&P Seeds, but I can’t find it online anymore. Basically, it was a bunch of seatbelt straps that were designed to wrap along the pumpkin vertically, and then there was a strap on the bottom to cinch it tight (see photos below for more details). I would contact your local pumpkin grower’s organization to see if you can get some local contacts for this.
2 ton chain hoist - DO NOT go cheap on this! I made the mistake of buying a cheap chain hoist on eBay, and it did nothing but give us problems for two years. The chain was short which meant I had to go on my tip toes to reach it, and the chain was not lined up well and would catch and sometimes get stuck while we were trying to lift it. The one I currently use is the GRIP (Grand Rapids Industrial Products) 2-ton chain hoist with 10' lift height. There are some options on Amazon, but I can't speak on their quality.
Step 1: Cut the 4x4's
You need to cut two of the 4x4's so they are at an angle. Make sure it's still fairly thick at the top since this will be supporting a lot of weight. I started my cut about 6 inches from the end and left a 1.75 inch thickness of the 4x4.

Step 2: Drill the holes for the bolt
Next you need to drill a hole in each 4x4 for the bolt. I did mine about 4 inches down. Make sure you do it so the bolt will be straight when the angles of the 4x4's are in place.

Step 3: Fasten bolt
I put a washer on each end and secured the bolt with two nuts to keep it more secure. Don't make the bolt too tight since you need some wiggle room when you're moving the tripod.

Step 4: Line tripod up around the pumpkin
See diagram below. You can adjust it after you get the tripod upright, but this is a good starting position.

Step 5: Start lifting tripod
This is best done with at least two people since it can be heavy and awkward. Don't lift it all the way up yet!

Step 6: Pause mid-way so you can attach the chain hoist
Once it's about 7 feet high, the tripod should stand on its own and still be low enough that you can start attaching the chain hoist. The tripod still has a risk of slipping here, so make sure you have a spotter, or put some rebar in the ground at the base of the 4x4 to keep it from slipping.

Step 7: Attach chain
Our chain is too short here. Ideally, you want it wrapped around each 4x4 equally so the weight is distributed equally as you're lifting the pumpkin. We will use one of our tractor clevises in the next step to joint the chain together and attach it to the chain hoist.

Step 8: Attach chain hoist
Use the tractor clevis to join the chain to the chain hoist.


Step 9: Finish lifting tripod
This is where you can do some fine tuning with each leg of the tripod so it's lined up with the pumpkin and gives you enough room to pull your truck/trailer under. Be sure to measure and make sure it's wide enough for your truck at the highest point that the truck bed will be going through.

Step 10: Secure tripod with rebar
I hammer rebar into the ground at the end of each 4x4 to prevent the legs from slipping out as I'm lifting the pumpkin.


Step 11: Attach pumpkin strap lifter to chain hoist
Whatever you decide to use to wrap underneath your pumpkin, use another tractor clevis to attach it to the chain hoist if needed.
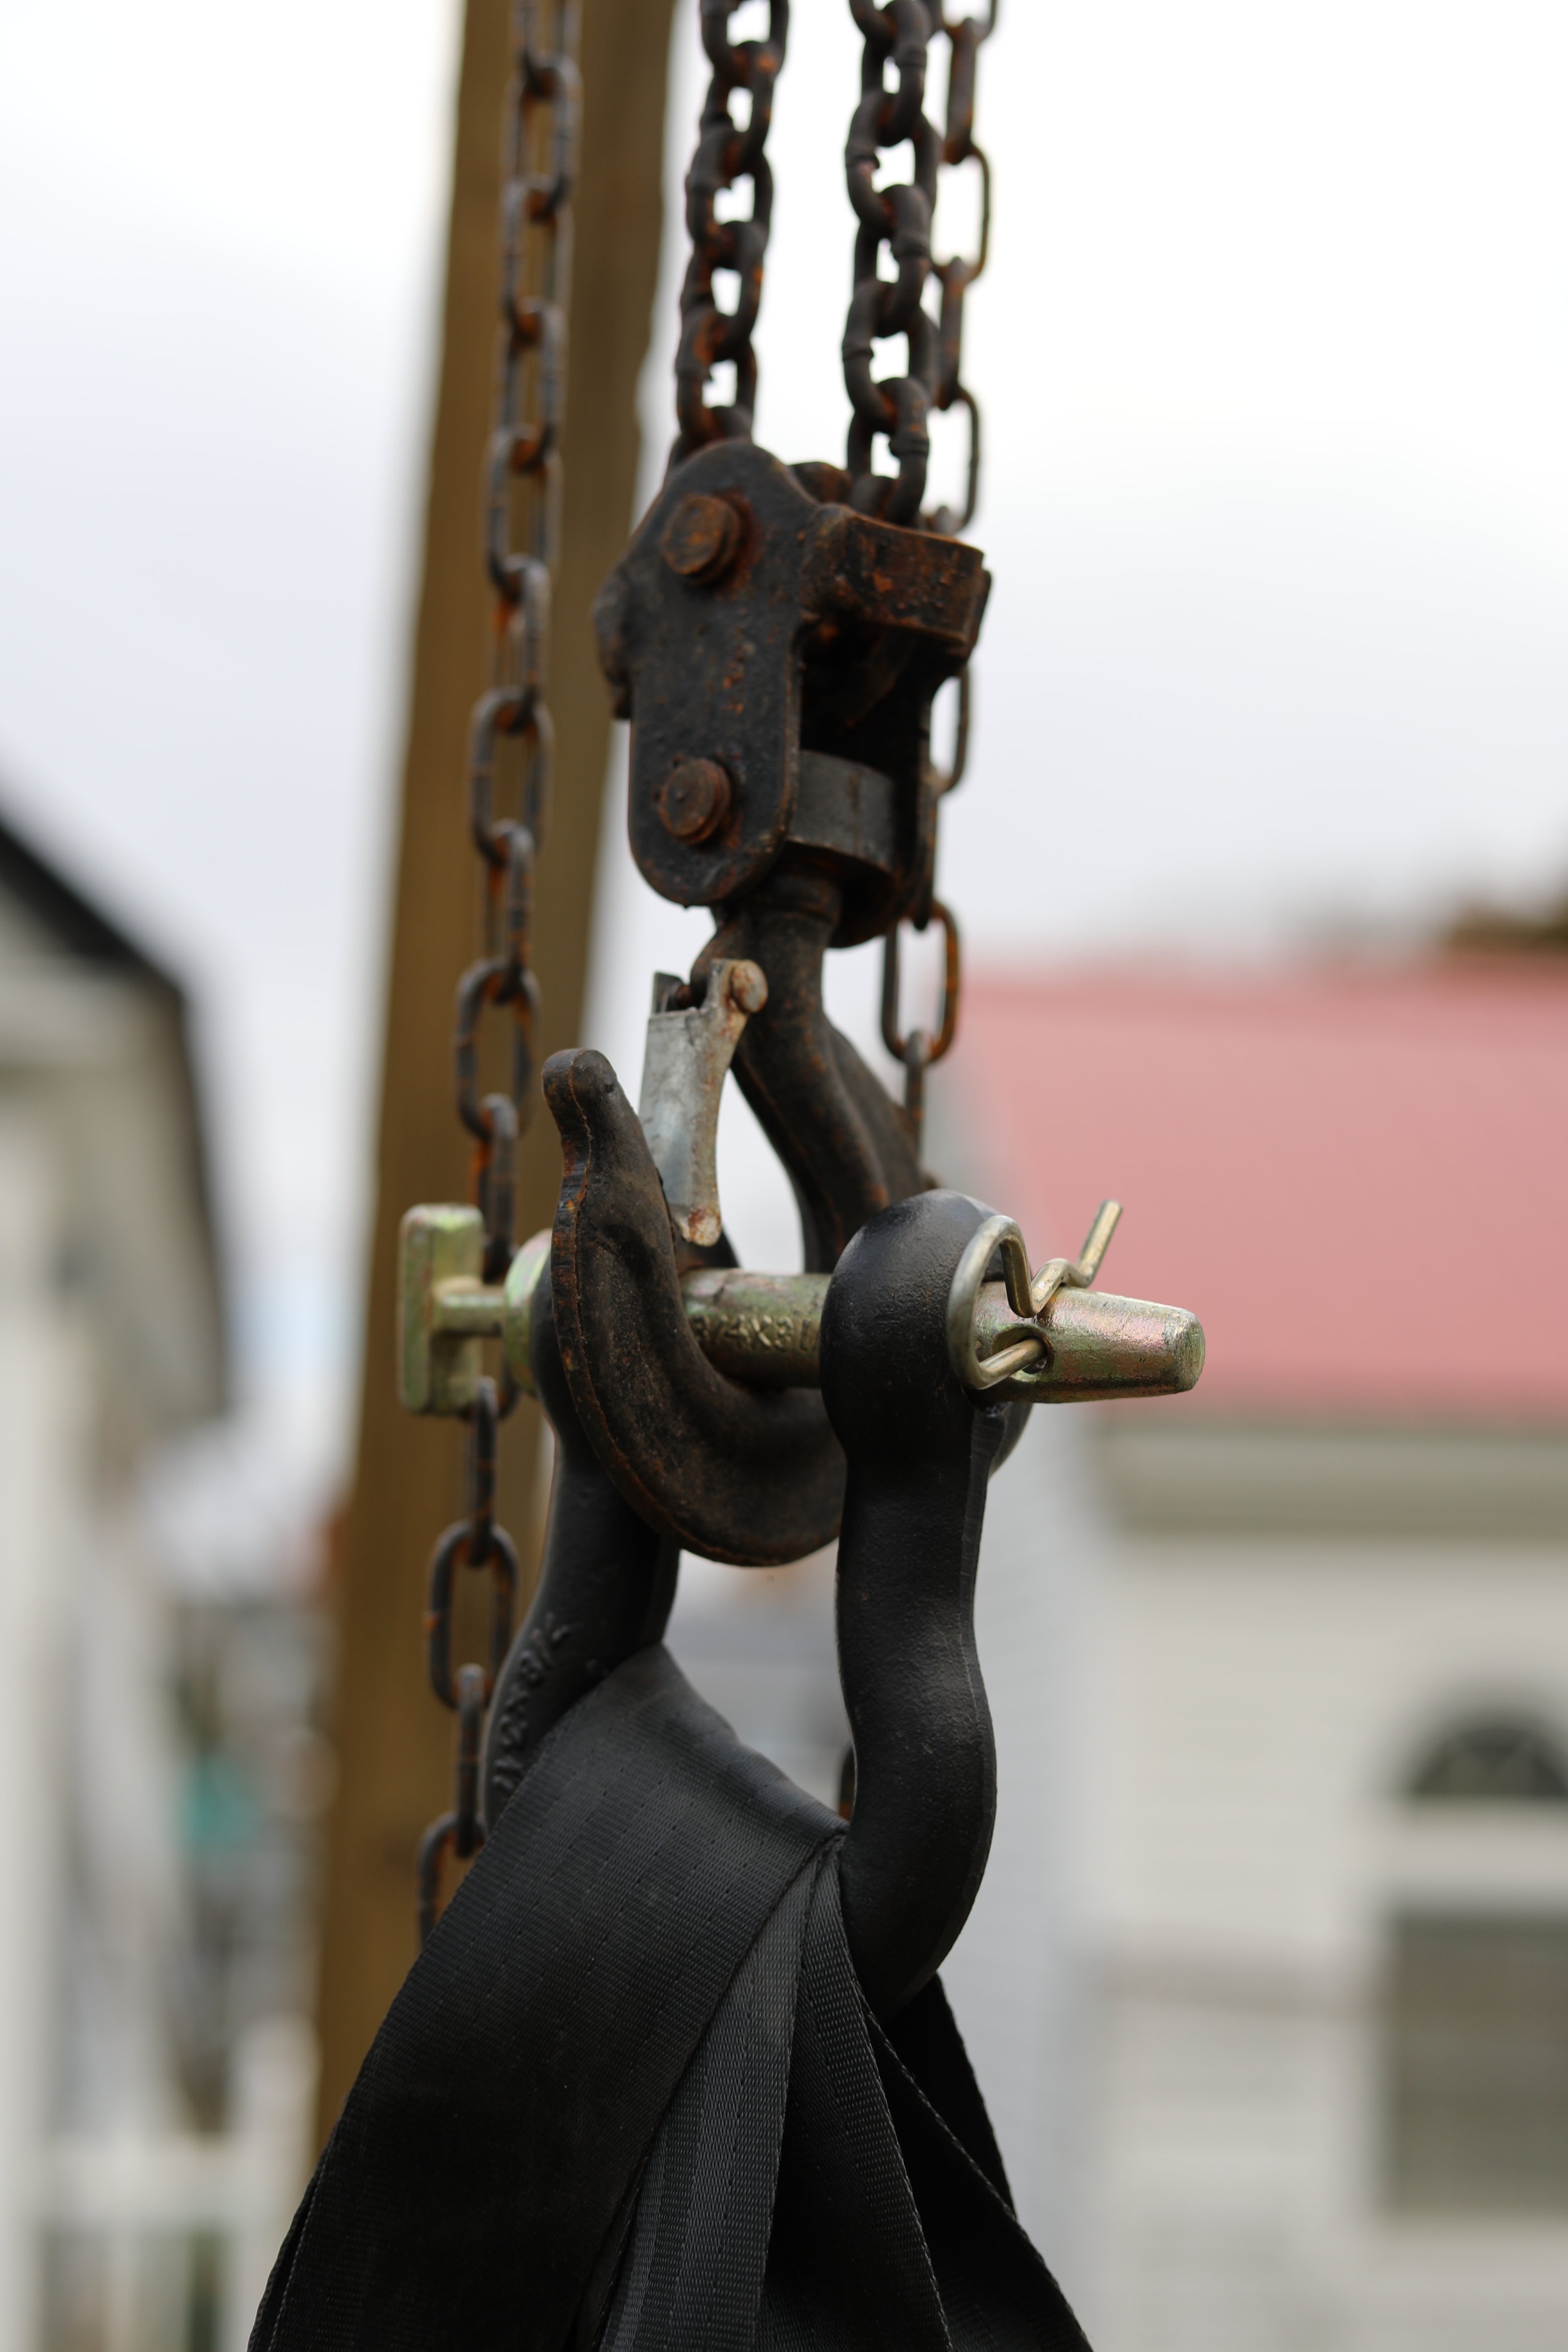

Step 12: Prepare for lift-off!
My original pumpkin strap lifter had the black seat belt material on the bottom, but I found that it didn't tie very well. I replaced this with my own rope (22 feet length). Make sure to get rope that doesn't stretch too much and that is rated for a weight higher than what you expect your pumpkin to be. My pumpkins sit on sand, so I usually dig out some of the sand from underneath so I can get the rope deeper beneath the pumpkin. If you're not careful, the pumpkin can slip out of the sling. This has happened to me, and I have seen it happen at weigh offs. Everybody ties their ropes off differently, but I recommend tying some sort of hitch that will come undone easy since the weight of the pumpkin will tighten the knot. Make sure it's strong enough of a knot that it will stay put while you're lifting the pumpkin though!

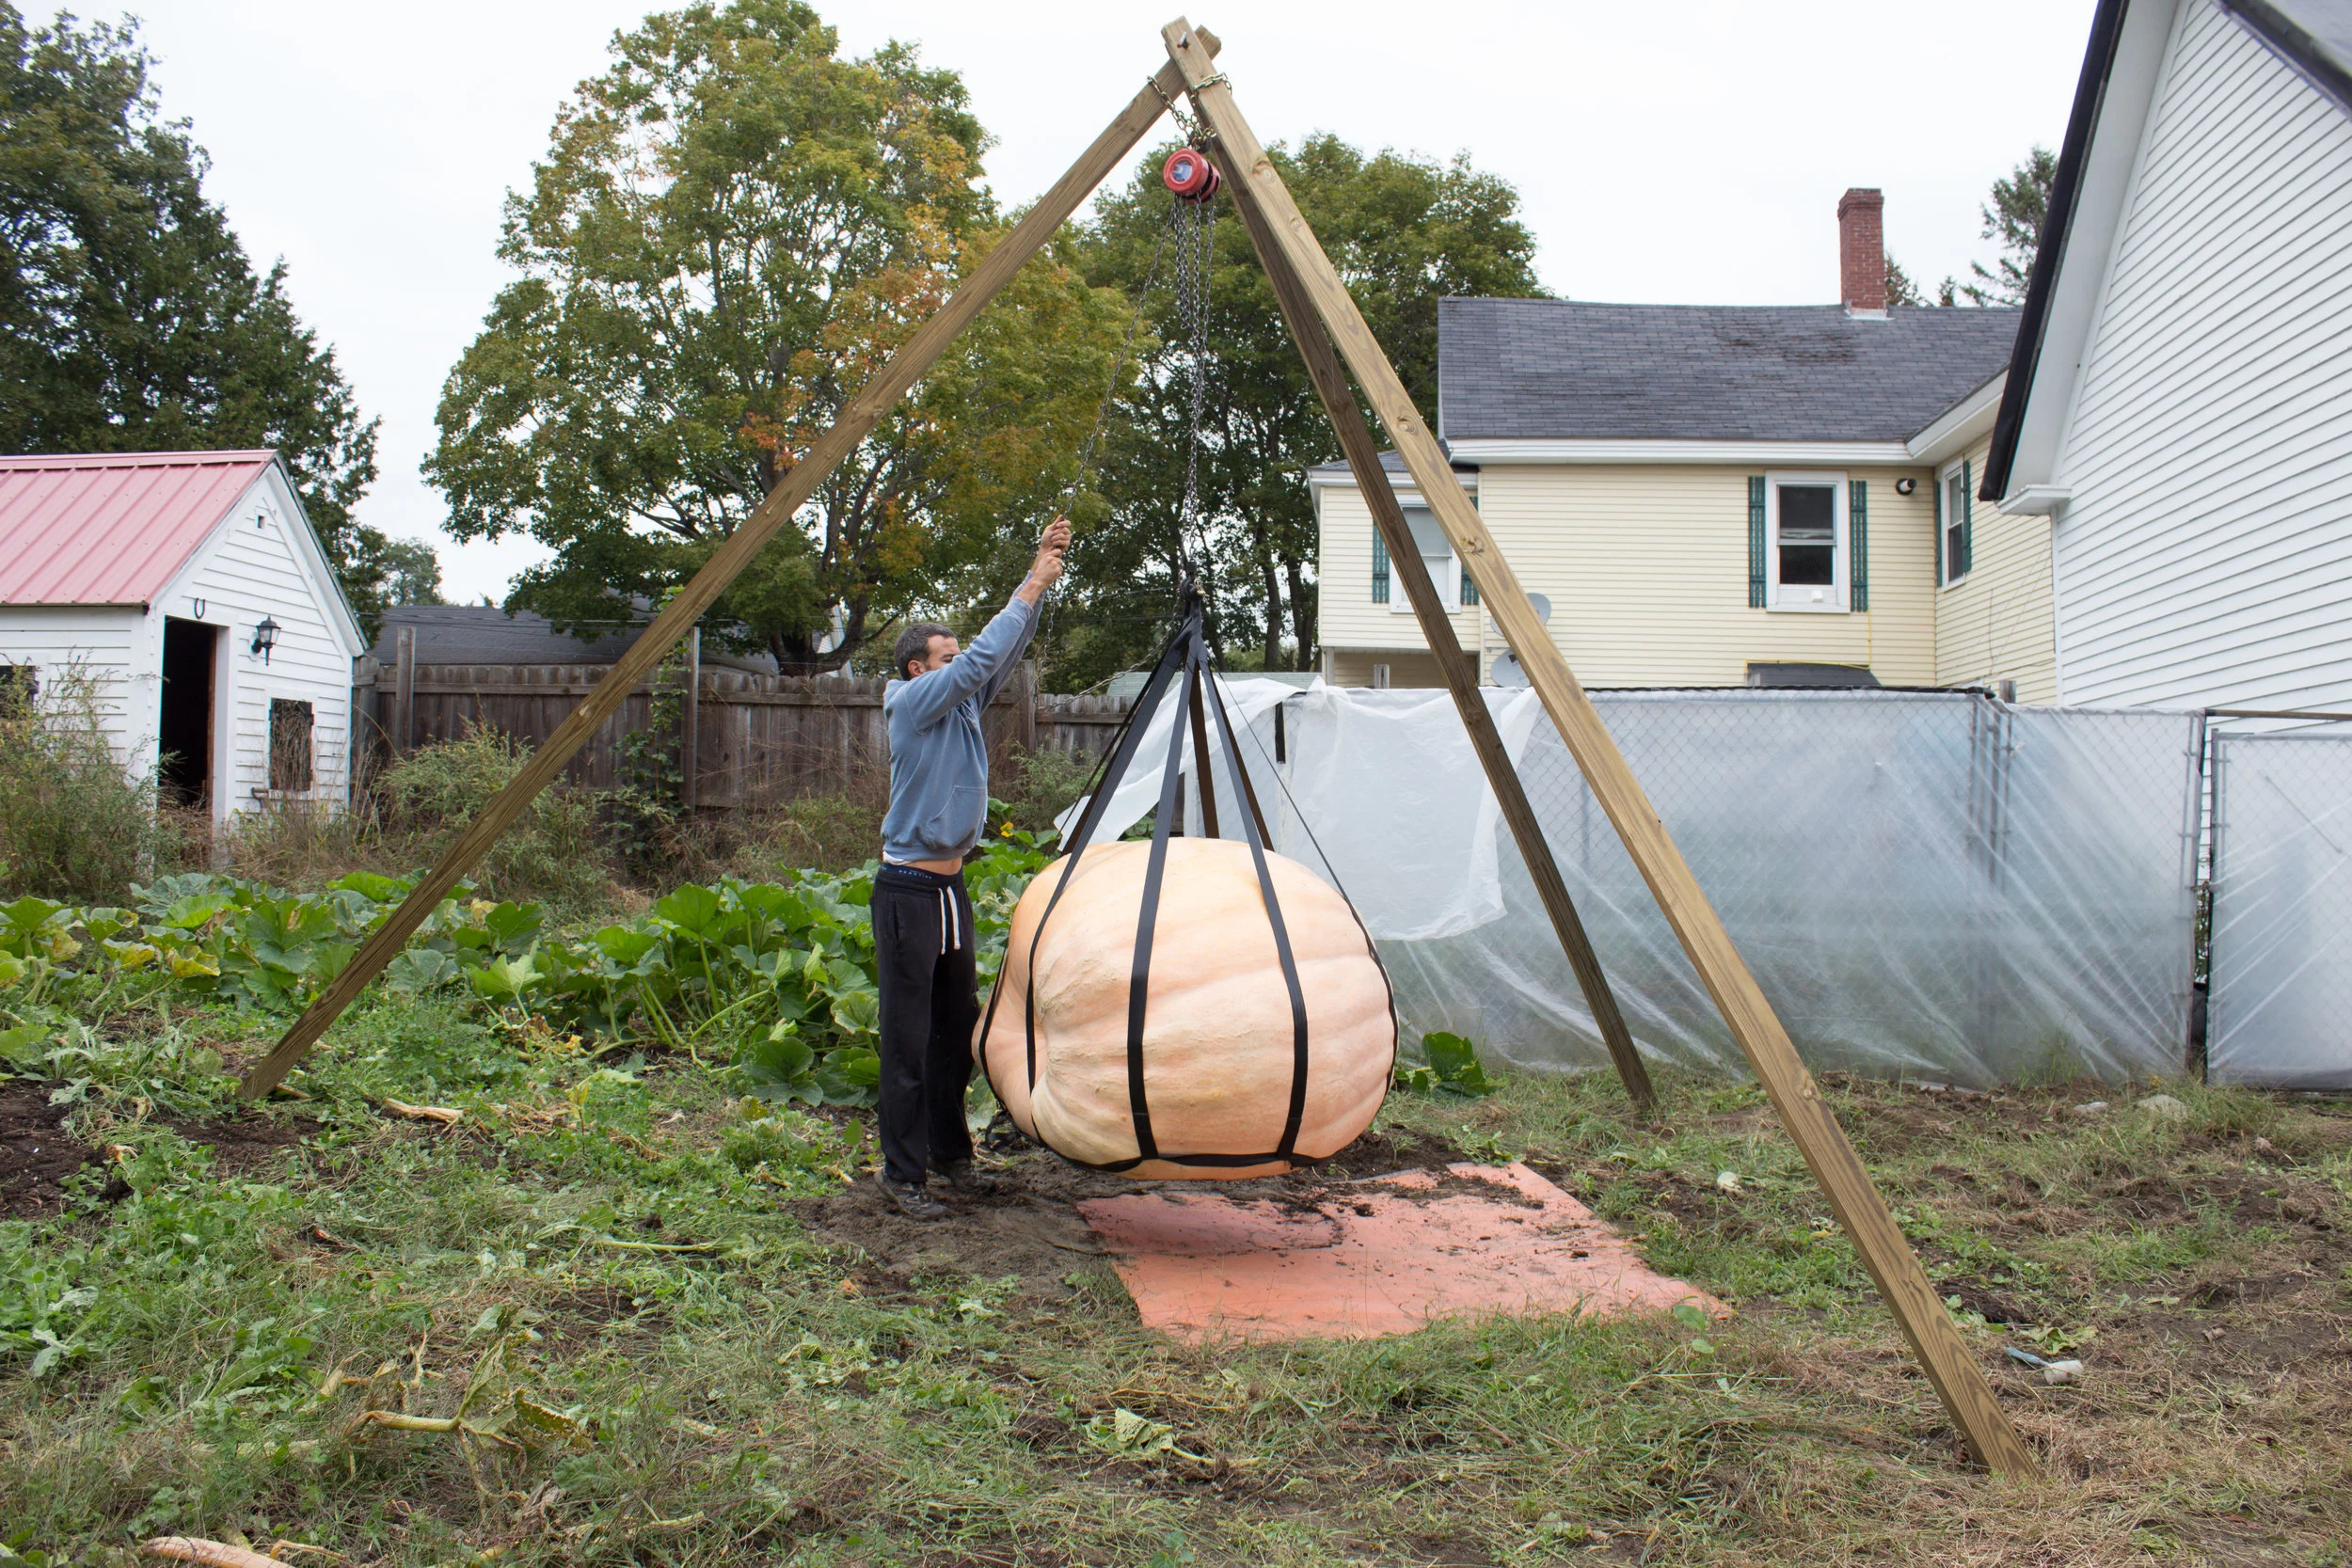
Step 13: Lift the pumpkin!
This photo is from a few years ago. As you can see, we had rebar holding the top together instead of a bolt. This was sketchy, and I don't recommend it! This is also our old eBay chain hoist. It was a pain trying to reach the chain, and it got stuck way too many times to make me feel safe using it anymore. Also, you can see how we don't have a tractor clevis on the top connecting the chain hoist to the chain. This system works, but the tractor clevis makes it much easier. Also notice how we are using the black seat belt material instead of the rope underneath the pumpkin. I prefer the rope better because it ties more securely.

Step 14: Drive truck/trailer under pumpkin and lower it down
Set up you pallet in the back of your truck. Carefully back your truck up underneath the pumpkin and gently lower it down. Even though the pumpkin may be heavy, you should still be able to push it a little as you lower it to get it exactly how you want it.

Below is a photo of Dale lifting one of our pumpkins from a few years ago. We didn't have sand underneath this pumpkin, so it was hard to get the bottom rope wrapped under as deep as we would have liked. When you are doing this, do it slowly and stand in as safe of a spot as you can in case something goes wrong. I often like to look underneath the pumpkin to see how concave the bottom is, but make sure not to stand underneath the pumpkin when you're doing this!
This works just as well for trailers as it does trucks!

Now all you have to do is tie down your pumpkin and head to the weigh off!
I hope this tutorial is helpful. I really want to stress the importance of safety while doing this. You are lifting something that can weigh over a ton with a homemade contraption, so you need to make sure you are using good sturdy equipment. And no matter how good your equipment is, always stand somewhere as safe as possible in case something were to go wrong.
Please comment below with any questions or constructive criticism!